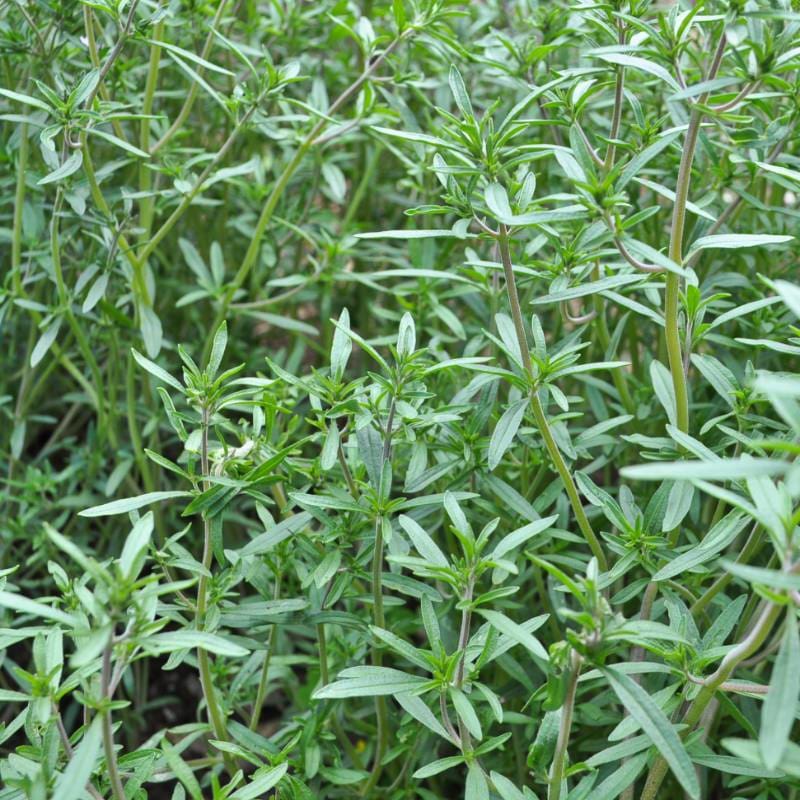
Growing dill in your garden is best done in a sunny and protected spot. You can prevent disease by watering your plants regularly. Once the seedlings start to grow, thin them when they are just a few inches high. Thinned, dill seed is edible. Don't be afraid of harvesting the seeds when they're still tiny! The spacing between seedlings of dill can be four to six inches apart. But, make sure you leave enough space to promote air circulation.
Plant dill in a sunny, sheltered spot
Dill will thrive in a sunny spot in your garden where it can receive lots of sunlight. It will also thrive in soil that is rich and well-drained. This herb requires regular watering. Make sure you water frequently, especially in the summer heat. It will also thrive if the soil is well-amended with compost or well-rotted manure. The soil will retain its moisture and nutrients. The plant can be directly sown in the ground or placed in a large, pot with peat-free multipurpose soil.
Dill is easy to grow. Start by planting seeds in the spring, covered. It is better to wait until frost danger has passed before planting seeds. After the danger of frost has passed, you can plant dill plugs in spring. Dill is a great plant for wildlife. It attracts hoverflies, bees, and other insects that feed off its nectar. It is also a food source to European swallowtail butterfly caterpillars.
Dill plants can grow in part-shade or full-sun conditions. However, they will need to be staked to avoid them from breaking. Depending on the location, you can harvest dill within two to four weeks. The spring and summer months are the best times to pick the leaves. If you have extra dill leaves, you can freeze them and use them later.
Dill has very few disease and pest problems. In warmer climates, however, Dill can bolt. This is when the plant grows quickly but has few leaves. This makes it difficult to harvest. Consider planting your dill plant in an area that receives 6 to 7 hours of direct sunlight to prolong its life.
Prune dill plants
Pruning dill plants is important. If the plant is left unpruned it will grow taller and leaner. You can prune dill by cutting off a third to half of the annual growth. This will promote new growth down the stalk. It's also a good idea for dill to be fertilized when it is just a few inches tall.
Regardless of the variety of dill, it is important to provide a deep pot and well-drained soil. To thrive, dill needs to be exposed to direct sunlight for 6 to 7 hours per day. The dill plant should have a lot of air circulation and be able to withstand heavy soil.
While the leaves of dill make a wonderful addition to cut flower arrangements, dill pruning for cut flower arrangements is a bit different than for culinary use. Instead of cutting the stems at the tips, use pruning shears to trim the stems at about a third of their length. This way, they will not produce additional dill. This will also slow down the plant's flowering.
If you cut the dill plant after harvesting the leaves, you can store them in water to enjoy fresh dill later on. Dill can be kept in a glass container with lid. Just make sure that you change the water daily. This will keep the dill leaves fresh and flavorful for up to a week.
If you want to use dill in your cooking, you can harvest its leaves when they reach six inches tall. The leaves can be harvested to preserve them and make it possible for you to keep them for next season. You can harvest the seeds easily once the flowers have dried. You can even save the seeds for future plantings. However, keep in mind that dill plants are not perennial and should be harvested at the end of the growing season. Dill plants can be destroyed by frost or heat.
Avoid growing dill near Brassicas
Dill can be beneficial for your garden, as it attracts beneficial bugs and discourages pests. Dill is good for plants in the Solanum family, which includes brassicas like cabbage, Brussels sprouts and cauliflower. These plants can use dill as a companion plant, especially when it is grown in close proximity to cabbage and broccoli. The plant produces compound umbels of white flowers and a light colored fruit. It can also serve as a green fertilizer plant.
Although dill can be quite low-maintenance it can still transmit diseases to plants nearby. Leaf spot is a disease that dill can be susceptible to. It is caused by microorganisms and fungi. Although the disease isn’t fatal in dill plants it can cause damage to nearby plants.
Dill is generally hardy, and can be grown in USDA zones 3-7 in the summer and 9-11 in the winter. Dill is an excellent companion plant to other plants such as Brassicas. It is a good choice for crops as it can attract aphids. It repels cabbage loopers. It can spread quickly because it is an annual.
Growing dill near asparagus can be helpful in reducing the impact of pests. It can attract beneficial insects such as ladybugs and lacewings that feed on aphids. In addition, dill can also help repel spider mites, which feed on plant tissue and sap. In addition, the plant can also provide shade and attracts birds that can help spread seeds and control pests.
Prevent dill diseases
Although dill is generally resistant to diseases, it can be affected by aphids from time to time. To get rid of aphids, simply spray the plant with water from a hose. Aphids stick in the leaves' undersides. Repeated spraying with water will kill them. In some cases, dill plants can also develop fungal infections. In this instance, spraying sulfur can be an effective remedy.
Downy mildew can also be a dill infection to avoid. This fungal disease may cause yellow spots on the leaves or fluffy growth. This can be prevented by planting dill in an area that has good air circulation. It is also a good idea for dill to be rotated, since this will prevent weed disease.
Also, it is important to trim dill plants frequently in order to maintain their health. Once your leaves are large enough to use, clipping dill plant should be done regularly. This will encourage more growth. A failure to trim dill frequently will result in sparse plant growth.
Dill plants can be grown once they have been planted. They should be watered every day and kept moist. The plant is capable of self-seeding, but the soil must be kept moist. Keep dill at ground level during winter. The plant will re-emerge in the spring.
Another way to prevent dill diseases is to make sure it receives ample amounts of sunlight. Dill is best grown in full sunlight, but it can also grow in part shade. It needs at least six hours of direct sunlight per day.
Harvest dill leaves
It is important to know the best time to harvest dill leaves when you are growing it. The best time for harvesting dill is when the plant has just begun to flower. This is the best time to pick the leaves, as the flower buds still are small. After harvesting the leaves, dry them and then freeze them. You can also leave some plants to germinate if you cannot wait for them to bloom.
Dill plants are characterized by four to five branches. When the leaves are 6-8 inches tall, and yellowing begins, it is time to harvest the leaves. It is best to harvest leaves in the morning, when the temperature and humidity are high. This will aid the plant in recovering faster after the trimming process, and will result in more leaves.
Harvesting dill leaves is easier than you might think. This herb can grow to many large plants. It is important to harvest leaves without damaging the plants. You can also gather dill seed, which are a yellowish color. These seeds are ready to eat right away or can be stored for later.
Dill will tolerate poor soil conditions as long as there is plenty of drainage and full sun. Dill will thrive in loamy, well-draining soil that is slightly acidic. You can even grow dill in a container. Make sure to water your plants often and give them plenty of air circulation to ensure they don’t dry out.
After picking dill leaves, wash them in cold water. Wrap the leaves in moist cloths and put them in the refrigerator. These leaves will stay fresh for two weeks. You should also remember to use the stems.
FAQ
Do I have to purchase special equipment in order to grow vegetables on my own?
It's not true. A shovel, trowel and watering container are all you need.
Which seeds should start indoors?
Tomato seeds are the best choice for starting indoors. Tomatoes can be grown quickly and they bear fruit all year. It is important to be careful when planting tomatoes in containers. The soil could dry out if you plant too early. This could lead to root rot. It is important to be aware that bacteria wilt can quickly kill plants.
Which type of lighting is best for indoor plants?
Florescent lights work well for growing plants indoors because they emit less heat than incandescent bulbs. They are also consistent in lighting, and do not flicker or dimm. Fluorescent bulbs can be purchased in regular and compact fluorescent versions. CFLs can use up to 75% more energy than traditional bulbs.
What is the purpose of a planting calendar?
A planting schedule is a list listing the dates when plants should be planted. The goal is for plants to grow at their best while minimizing stress. The last frost date should be used to sow early spring crops, such as spinach, lettuce, and beans. Cucumbers, squash, and spring beans are later crops. Fall crops include potatoes, carrots, broccoli, cauliflower and broccoli.
Statistics
- According to the National Gardening Association, the average family with a garden spends $70 on their crops—but they grow an estimated $600 worth of veggies! - blog.nationwide.com
- 80% of residents spent a lifetime as large-scale farmers (or working on farms) using many chemicals believed to be cancerous today. (acountrygirlslife.com)
- Most tomatoes and peppers will take 6-8 weeks to reach transplant size so plan according to your climate! - ufseeds.com
- Today, 80 percent of all corn grown in North America is from GMO seed that is planted and sprayed with Roundup. - parkseed.com
External Links
How To
Use organic fertilizers in your garden
Organic fertilizers are made from natural substances such as manure, compost, fish emulsion, seaweed extract, guano, and blood meal. The term "organic" refers to using non-synthetic materials in their production. Synthetic fertilizers are chemical compounds used in industrial processes. These fertilizers are commonly used in agriculture, as they can provide nutrients to plants quickly without the need for complicated preparation. Synthetic fertilizers are dangerous for the environment as well as human health. In addition, they require large amounts of energy and water to produce. Many synthetic fertilizers are also harmful to groundwater and water surface because of runoff. This pollution is harmful to wildlife and humans.
There are many organic fertilizers available:
* Manure is a product of livestock eating nitrogen-rich food (a plant nutrient). It's made of bacteria and enzymes which break down the waste to simple compounds that can be taken by plants.
* Compost - A mixture of grass clippings from the lawn, decaying leaves, vegetable scraps, and animal dung. It is rich with nitrogen, phosphorus. potassium, calcium. magnesium. sulfur. iron. copper. manganese. molybdenum. chlorine. and carbon. It is highly porous, so it holds moisture well and releases nutrients slowly.
* Fish Emulsion is a liquid product made from fish oil. It has the ability to dissolve oils, fats and is very similar to soap. It contains phosphorous, nitrogen, and trace elements.
* Seaweed Extract - a concentrated solution of minerals extracted from kelp, red algae, brown algae, and green algae. It is a good source of vitamins A, C, iron, and iodine.
* Guano is excrement from amphibians, seabirds, bats and reptiles. It contains nitrogen, phosphorous, potassium, sodium, magnesium, sulfate, chloride, and carbon.
* Blood Meal: The remains of animal carcasses. It is high in protein, making it suitable for feeding poultry and other livestock. It also has trace minerals such as phosphorous, potassium, nitrogen and other nutrients.
For organic fertilizer mix equal amounts of manure, compost and/or fishemulsion. Mix well. If you don’t have access, you can mix one ingredient with the other. If you only have the fish-emulsion you can substitute one with another.
Apply the fertilizer by spreading it evenly using a tiller or shovel. One quarter cup of the fertilizer should be spread per square foot. To see new growth, you will need to apply more fertilizer every 2 weeks.